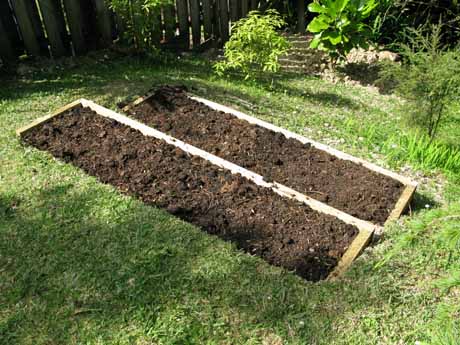
While it’s possible to plant on slopes without using raised beds, water run-off means the soil and plants dry out quickly. Terrace garden beds are the perfect solution and it means flowers and vegetables can be grown in a space that might otherwise be wasted.
The contours of your garden will guide your design, but when starting out, restrict your terraces to a manageable size. Large terraces need proper drainage and extra reinforcement; the pressure of water-logged soil behind a wall can be huge and cause large or improperly constructed walls to collapse. A series of small beds is easier to construct and a safer option.
Use sturdy material (plywood won’t cut it) and make sure your beds are securely anchored in place.
Materials
2 x lengths 2.2m x 200mm x 50mm rough-sawn tanalised pine
4 x sides 500mm x 200mm x 50mm rough-sawn tanalised pine
6 x wooden pegs (stakes) 600mm x 45mm x 35mm
100mm x 4mm flathead galvanised nails
75mm x 3.15mm flathead galvanised nails
Small stakes for marking out beds
Tools
Spade; Tape measure; Level; Electric drill; Hammer; Sledge hammer
Step 1
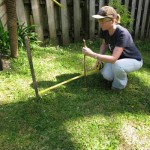
Measure and mark out the size of your first bed using small stakes. Ours is 2.2m long and 550mm wide. Allow another (at least) 250mm for a small walkway in between beds.
Step 2
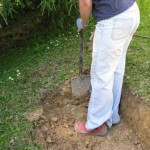
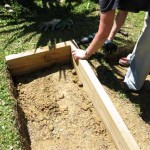
Start building your beds. Dig a trench for your first tier, 200mm deep at the back and 80mm wide (includes 250mm for the walkway). Make sure the base of your terrace is level.
Step 3
Start digging your next tier, 800mm out from the bottom edge of your first tier.
Step 4
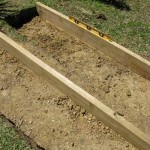
Place the 2.2m lengths on each tier, 500mm from the back walls. Check that each terrace is level.
Step 5
Position the side pieces in place. Drill three pilot holes through each bed end, then nail in place with the 100mm galvanised nails.
Step 6
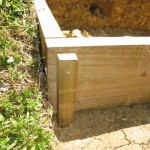
Drive pegs into soil with sledge hammer. Position two of the pegs 30mm in from each end, and one in the centre, driving each peg 20mm below the top of the bed. Drill two pilot holes into each peg and secure with 75mm nails. You can now fill your bed with soil.



Hi Jane,
Thanks for posting this. You made it look easy to follow for beginners like me.I was expecting something in the end after step 6, like a final suggestion or something but I think the whole step by step process is enough so I guess I think you thought it wasn’t necessary anymore.
Hi Nina
Just ask away if there is something that’s unclear or needs further explaining. That really is the end of the steps. From then on you just need to fill your bed with soil and compost and plant it up with vegetables or flowers. Jane
Jane,
We live in an area that can receive heavy rain fall in the spring and fall. Even though these are smaller terraces, could a problem with drainage occur and what would be a simple solution?
Hi Angela
So long as you have good drainage (not clay or clumpy soil) in your beds, you should be fine. Fill your beds with good quality free-draining soil.
Any advice for doing this off of a patio? My slope is slowly washing out so I was thinking this would be a great way use that space but, without the yard behind it, do you think it will fall?
Hi Lacey
I would need to see the layout really to make a comment. If you want to send me an image, do so at jane [at] plainjanemedia.co.nz
Jane
Hi,just wanted to tell you, I liked this post. It was helpful.
Keep on posting!
My hillside is kinda steep and above a 12 foot retaining wall. Do you have or know of any directions for building on a much steeper slope? The slope is about 25 feet long, and I would like to go down the entire way.
Thanks a ton,
Cam
Hi Cam
You can do the same for very steep slopes. The only difference is that your terraces will be much narrower.
Thank you for publishing this Jane, it will be very helpful for me. I will be establishing an Australian native garden on a slope similar to what you have pictured, and will use the method you have described.
Based on the dimensions you have noted, the two terraces cover approximately 1.6 metres horizontally, and account for 40cm fall over that distance. That’s a 25% gradient which is exactly what we have to work with. Another way of calculating what you have shown is that over a 4 metre horizontal distance, exactly 5 terraces will be installed (400cm divided by 80cm for each terrace). Each terrace is 20cm deep, so that’s 100cm of fall over 400cm horizontal distance – a 1:4 slope.
Before reading your article I was concerned about needing very high retaining walls which would be expensive to construct (beyond my DIY ability) and would likely require drainage. So it’s a great idea to use lots of small terraces instead!
Thanks again,
Andrew
Thanks Andrew 🙂 Good luck! Would love to see a pic of the finished terraces.
Just completed a small terraced, 3 steps, and after watering regularly I’m now finding evidence at the bottom of the lowest level of drainage. Everything is already in place with the wall of the last step being heavy stone. The question is now how do I fix it. It is draining out onto a sidewalk through about 10″ of sandy soil. I’m guessing a drain of some kind is needed but what kind and how/where to put it? I’m 72 and doing the work by myself.
Hi Judy. You could perhaps dig a small trench a little further down from your terraced garden. The water should accumulate in here and eventually sink into the soil. The dirt removed from the trench is banked up on the downhill side to create a mound, which is called a berm. You can then plant the berm with ground covers. You can dig one or two of these trenches down your slope. If you would prefer actual drainage materials, you would be best to visit your local DIY store and ask them what they suggest with regards to drainage. There are all sorts of different products available today, and I’m not qualified to make suggestions in this area. If you can take a digital image (camera or cell phone) of the problem drainage area to show them, I’m sure that would be helpful. Hope this helps.
this looks great! I live in Quincy, Massachusetts. my yard abuts a salt marsh. at the very top of my yard is a somewhat steep slope that my wife and I are concerned will erode, and have been looking for a solution. I think this will be it! what are your thoughts? thanks very much.
Hi Joshua
I’m sorry but I can’t really comment about your particular garden as I am unfamiliar with the soil there (I live in NZ and my particular soil is clay). However, terracing DIYs can certainly be effective on slopes. And most slopes can become relatively stable with plants. I would talk to a local landscape expert in your area to see what they suggest. Digging and tilling can destabilise a slope, so your landscape expert should be able to advise you on that. Your local council may have suggestions for planting on banks (in NZ we can often get diagrams of clay bank vegetation, for example). Good luck!